A narrow cloakroom needs careful planning to make every fixture useful without making the space feel cramped. Installing a basin in a limited area requires more than choosing a compact design. Its position, mounting height, plumbing connections, and clearance around the fixture all affect how comfortable the room will be to use.
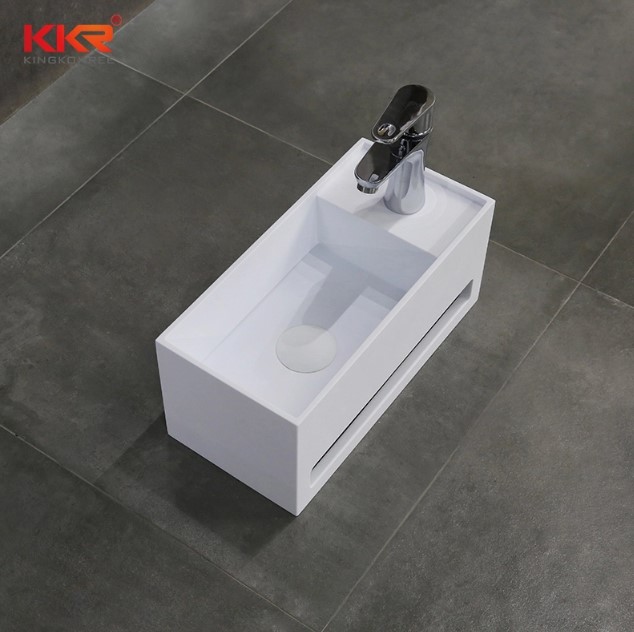
A well-chosen Small basin for toilet can provide a practical handwashing area without taking up too much floor space. The key is to measure the available area before buying the fixture and plan the installation around the door, toilet, and existing pipework. This approach helps prevent fitting problems and makes better use of the room.
Assess The Available Space Before Installation
Start by measuring the cloakroom from wall to wall. Record the room’s length and width, then check the distance between the toilet, door, and proposed basin position. These measurements will help determine how much space remains for comfortable movement.
Pay attention to the door swing as well. A basin placed too close to an inward-opening door may obstruct access or cause the door to hit the fixture. In very narrow cloakrooms, changing the door direction or using a sliding door may create more usable space.
Also check the position of the water supply and waste outlet. Placing the basin near existing connections can reduce plumbing work and avoid unnecessary pipe extensions.
Choose A Basin That Fits The Cloakroom
The basin should suit the room’s dimensions rather than simply look attractive in a product photograph. A deep or wide fixture may take up too much room and make it difficult to stand comfortably in front of it.
Consider Wall-Mounted Designs
Wall-mounted basins work well in narrow cloakrooms because they leave the floor underneath open. This creates a less crowded appearance and makes cleaning easier. They also allow some flexibility in choosing the installation height.
Before selecting this design, confirm that the wall can support the basin’s weight. Solid masonry walls usually provide suitable support, while stud walls may need additional reinforcement.
Look At Corner And Compact Rectangular Options
A corner basin can make use of an area that might otherwise remain unused. It works particularly well when the toilet sits along the opposite wall and the available floor space is limited.
Compact rectangular basins offer another practical option. Their straight edges can sit neatly against a wall, making them easier to position in narrow layouts. Check the bowl depth and width to ensure that the basin remains comfortable for handwashing.
Mark The Correct Basin Position
Once you have selected the basin, mark its intended position on the wall. Use a measuring tape and spirit level to establish a straight horizontal line. The markings should show the basin’s top edge, mounting points, and the location of the tap.
Standard basin height often falls around 80 to 85 cm from the finished floor. However, the final height depends on the basin design and the people who will use it. Check the manufacturer’s installation instructions before drilling.
You also need enough clearance between the basin and nearby fixtures. Leave adequate room to stand in front of it and use the tap without hitting the toilet or a wall. The exact spacing depends on the room layout and local building requirements.
Prepare The Wall And Plumbing Connections
Before drilling, inspect the wall for hidden electrical cables and water pipes. A suitable detector can help identify concealed services and reduce the risk of accidental damage.
Turn off the water supply before working on the plumbing. Prepare the hot and cold water connections where required, along with the waste outlet. In a cloakroom with limited space, exposed pipes can make the area look untidy, so consider a compact bottle trap or suitable pipe cover.
For wall-mounted basins, check that the wall structure can handle the load. Install the correct brackets, bolts, or support frame according to the product instructions. Do not rely on ordinary wall plugs when the wall material cannot provide sufficient support.
Install The Basin Step By Step
After preparing the wall and connections, you can begin fitting the fixture. Follow the manufacturer’s instructions because mounting methods vary between basin models.
1. Fit The Tap And Waste Assembly
It is usually easier to install the tap and waste fittings before securing the basin to the wall. Place the tap in its designated opening and tighten the fixing components according to the instructions.
Attach the waste assembly and check that its seals sit correctly. Poorly fitted washers can cause leaks once water starts flowing.
2. Secure The Basin To The Wall
Position the basin against the marked area and align its mounting holes with the prepared supports. Tighten the fixings evenly without applying excessive force, which could damage the basin.
Use a spirit level to confirm that the fixture sits straight. An uneven basin may cause water to collect on one side rather than drain properly.
3. Connect The Water Supply
Attach the supply pipes to the tap connections. Flexible connectors often make installation easier in tight spaces, provided they have the correct size and rating.
Check that each connection fits securely. Avoid twisting or bending the pipes too sharply, as this may affect water flow or damage the connectors.
4. Connect The Waste Pipe
Join the basin waste outlet to the existing drainage pipe using a suitable trap and connector. Make sure the pipe has the correct alignment and fall so that wastewater drains without collecting inside it.
Tighten the connections and check that the trap remains accessible for future cleaning. A removable trap makes it easier to deal with blockages in a compact cloakroom.
5. Seal The Basin Edges
Apply bathroom-grade silicone sealant along the joint between the basin and wall where the installation instructions require it. Smooth the sealant to create a neat finish and prevent water from entering the gap.
Allow the sealant to cure for the recommended period before using the basin. Rushing this step may weaken the seal and lead to moisture problems.
Test The Installation Before Regular Use
Once the basin is fitted, turn the water supply back on gradually. Open the tap and let water run into the bowl while checking the supply connections, waste assembly, and trap.
Look for drips around the tap base and underneath the basin. Fill the bowl partially, then release the water to check how quickly it drains. Slow drainage may indicate a poorly aligned waste pipe or an issue with the trap.
Also check that the basin remains stable when light pressure is applied. Any movement around the mounting points needs attention before regular use.
Avoid Common Installation Problems
Small cloakrooms leave little room for installation errors. A fixture that looks suitable on its own may cause problems once the toilet, door, and other fittings are in place.
Watch out for these common issues:
- Choosing the wrong basin depth: A deep bowl may restrict movement in front of the toilet.
- Ignoring door clearance: The door may strike the basin or prevent it from opening fully.
- Installing the basin too high or low: An unsuitable height can make handwashing uncomfortable.
- Using weak wall fixings: Poor support may cause the basin to loosen over time.
- Leaving plumbing connections inaccessible: Hidden traps and joints make repairs more difficult.
- Skipping the leak test: Small leaks can damage walls, flooring, and nearby fixtures.
Taking time to check these details before installation helps avoid costly adjustments later.
Make The Most Of The Space Around The Basin
A compact basin does not need a bulky vanity unit underneath it. Wall-mounted designs keep the floor visible and create a more open appearance. A small wall shelf or narrow cabinet can provide space for hand soap and other essentials without taking up much room.
Choose a mirror that fits the available wall area. A mirror above the basin can make the cloakroom feel brighter and visually larger. Wall-mounted soap dispensers and towel rings also help keep the countertop clear.
Lighting deserves attention too. A well-placed ceiling light or wall fixture makes the basin easier to use and prevents dark corners from making the room feel smaller. Light-coloured wall finishes can further support an open and clean appearance.
Final Checks For A Practical Cloakroom
A successful basin installation depends on accurate measurements, suitable wall support, correctly connected plumbing, and enough clearance around the fixture. Each step contributes to a setup that works comfortably within a narrow room.
Before completing the project, check the basin’s stability, water flow, drainage, and sealant. Keep the final arrangement simple so that the room remains easy to clean and convenient for everyday use. With careful planning and the right fixture, kingkonree can help homeowners explore compact basin options that suit smaller toilet spaces.